
rAlph – attaching files to the assistant
rAlph is your AI assistant in roleALPHA. You’ll recognize it by the sun symbol (a nod to the sun god Ra) in the bottom right. rAlph does more than answer questions — it can also analyze files: upload one or more documents and rAlph proposes matching entities, e.g. people from a team overview or roles from an org handbook.
Larger window & dedicated page
Section titled “Larger window & dedicated page”The floating chat window can be enlarged and opened as a full page:
- Enlarge: the icon in the header toggles between the small and large window.
- Open on full page: the “open on full page” icon (or the rAlph entry in the sidebar) takes you to the full-page view. It shows the current conversation full-width, ChatGPT/Claude-style — the same history as in the floating window.
History is kept for the entire session and survives a page reload (F5) — so you can safely refresh without losing your conversation. You can clear it manually anytime via New chat; it is discarded when you log out or close the browser tab. (File attachments that haven’t been sent yet are lost on a reload.)
Attachments stay available for the whole conversation: once sent, rAlph keeps your files across the entire history — so you can refer back to a previously uploaded PDF, image or document in a later message without attaching it again (e.g. “Now also add the remaining roles from the PDF”). This still holds when you later reopen the conversation from the history: the draft cards and the attached files remain available for analysis. An attachment also shows as a chip with its file name on the respective message. If a lot of, or very large, attachments pile up, rAlph keeps the most recent ones in context; the oldest drop out as needed.
On the full-page rAlph view the floating sun button is hidden — you work directly with the full-page interface there.
Start screen & input
Section titled “Start screen & input”While no conversation is running yet, the input field on the rAlph page sits centered in the middle — with a short greeting and a few example questions you can click directly. As soon as the first message is sent, the history moves to the top and the input field to the bottom.
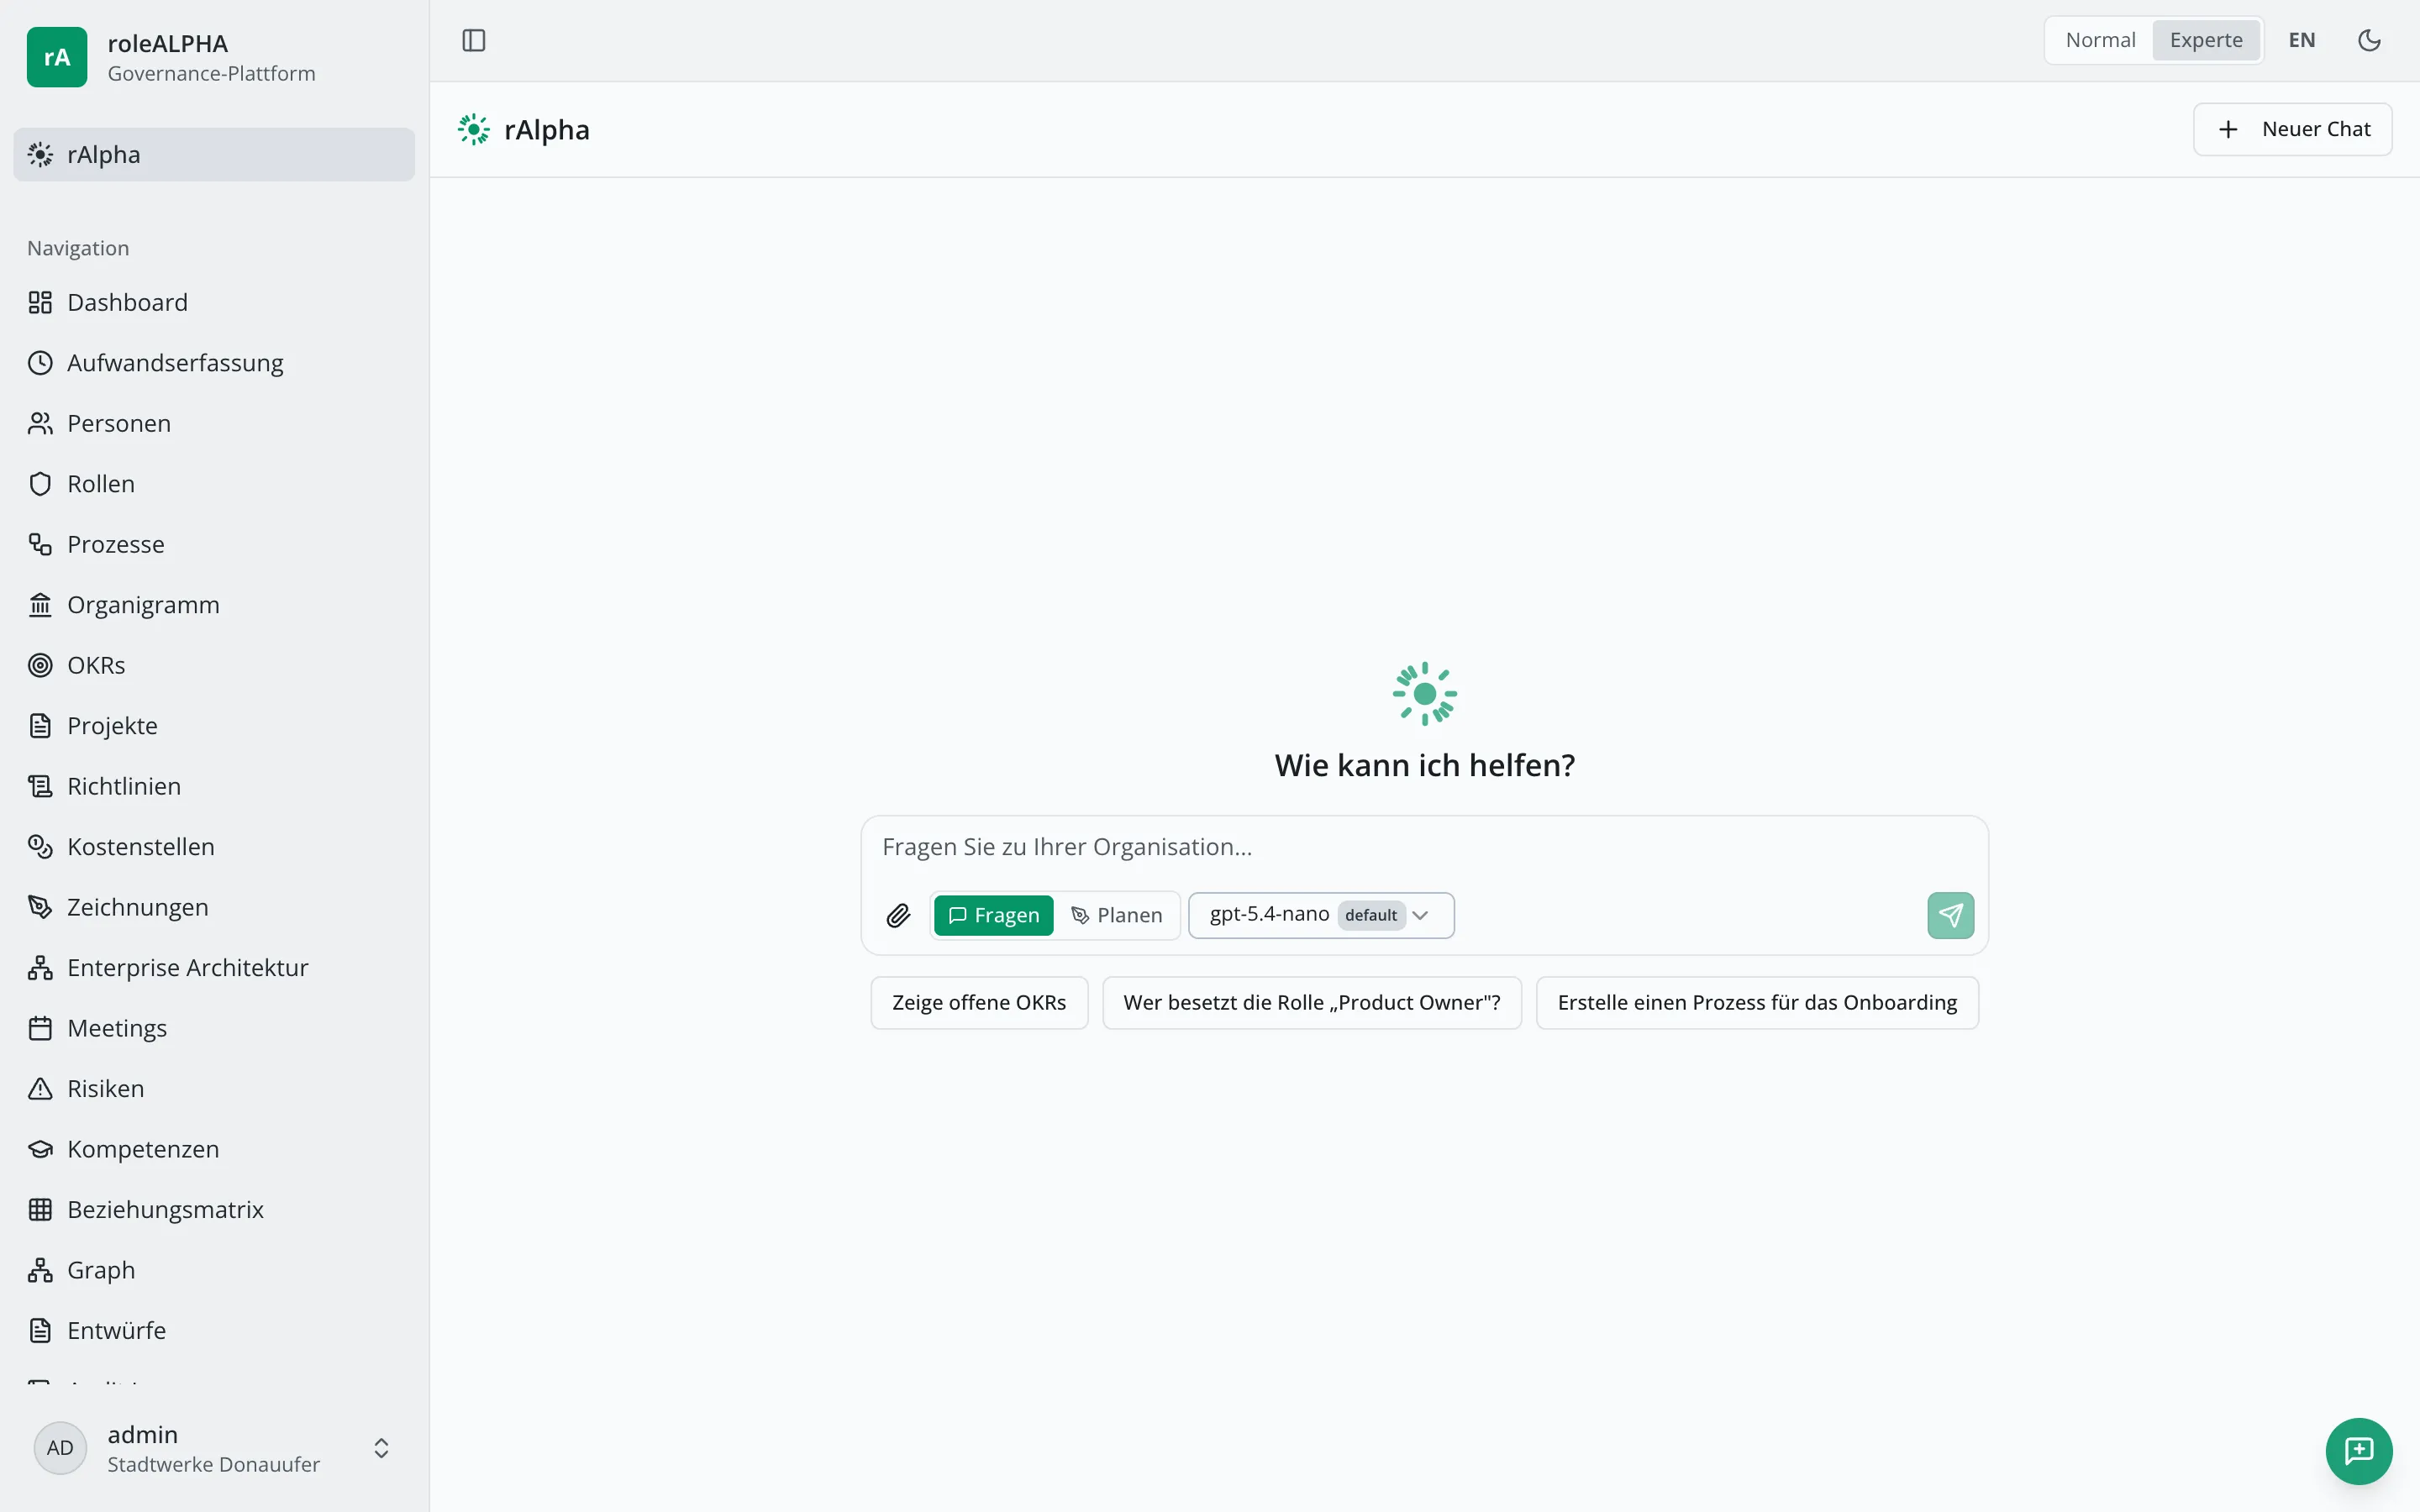
The input field is multi-line:
- Enter sends the message.
- Shift+Enter inserts a line break (for longer, structured input).
The controls sit directly below the input field: file attachment, the Ask/Plan toggle and the model selector — just like common AI chats.
Attaching files
Section titled “Attaching files”Open the chat and add files in two ways:
- Paperclip button below the input field → opens the file picker.
- Drag & drop: drag files directly onto the chat window.
Supported formats:
- Images: PNG, JPG, WebP, GIF
- Documents: PDF, Word (DOCX), Excel (XLSX/XLS)
- Text: TXT, Markdown, CSV, JSON, XML
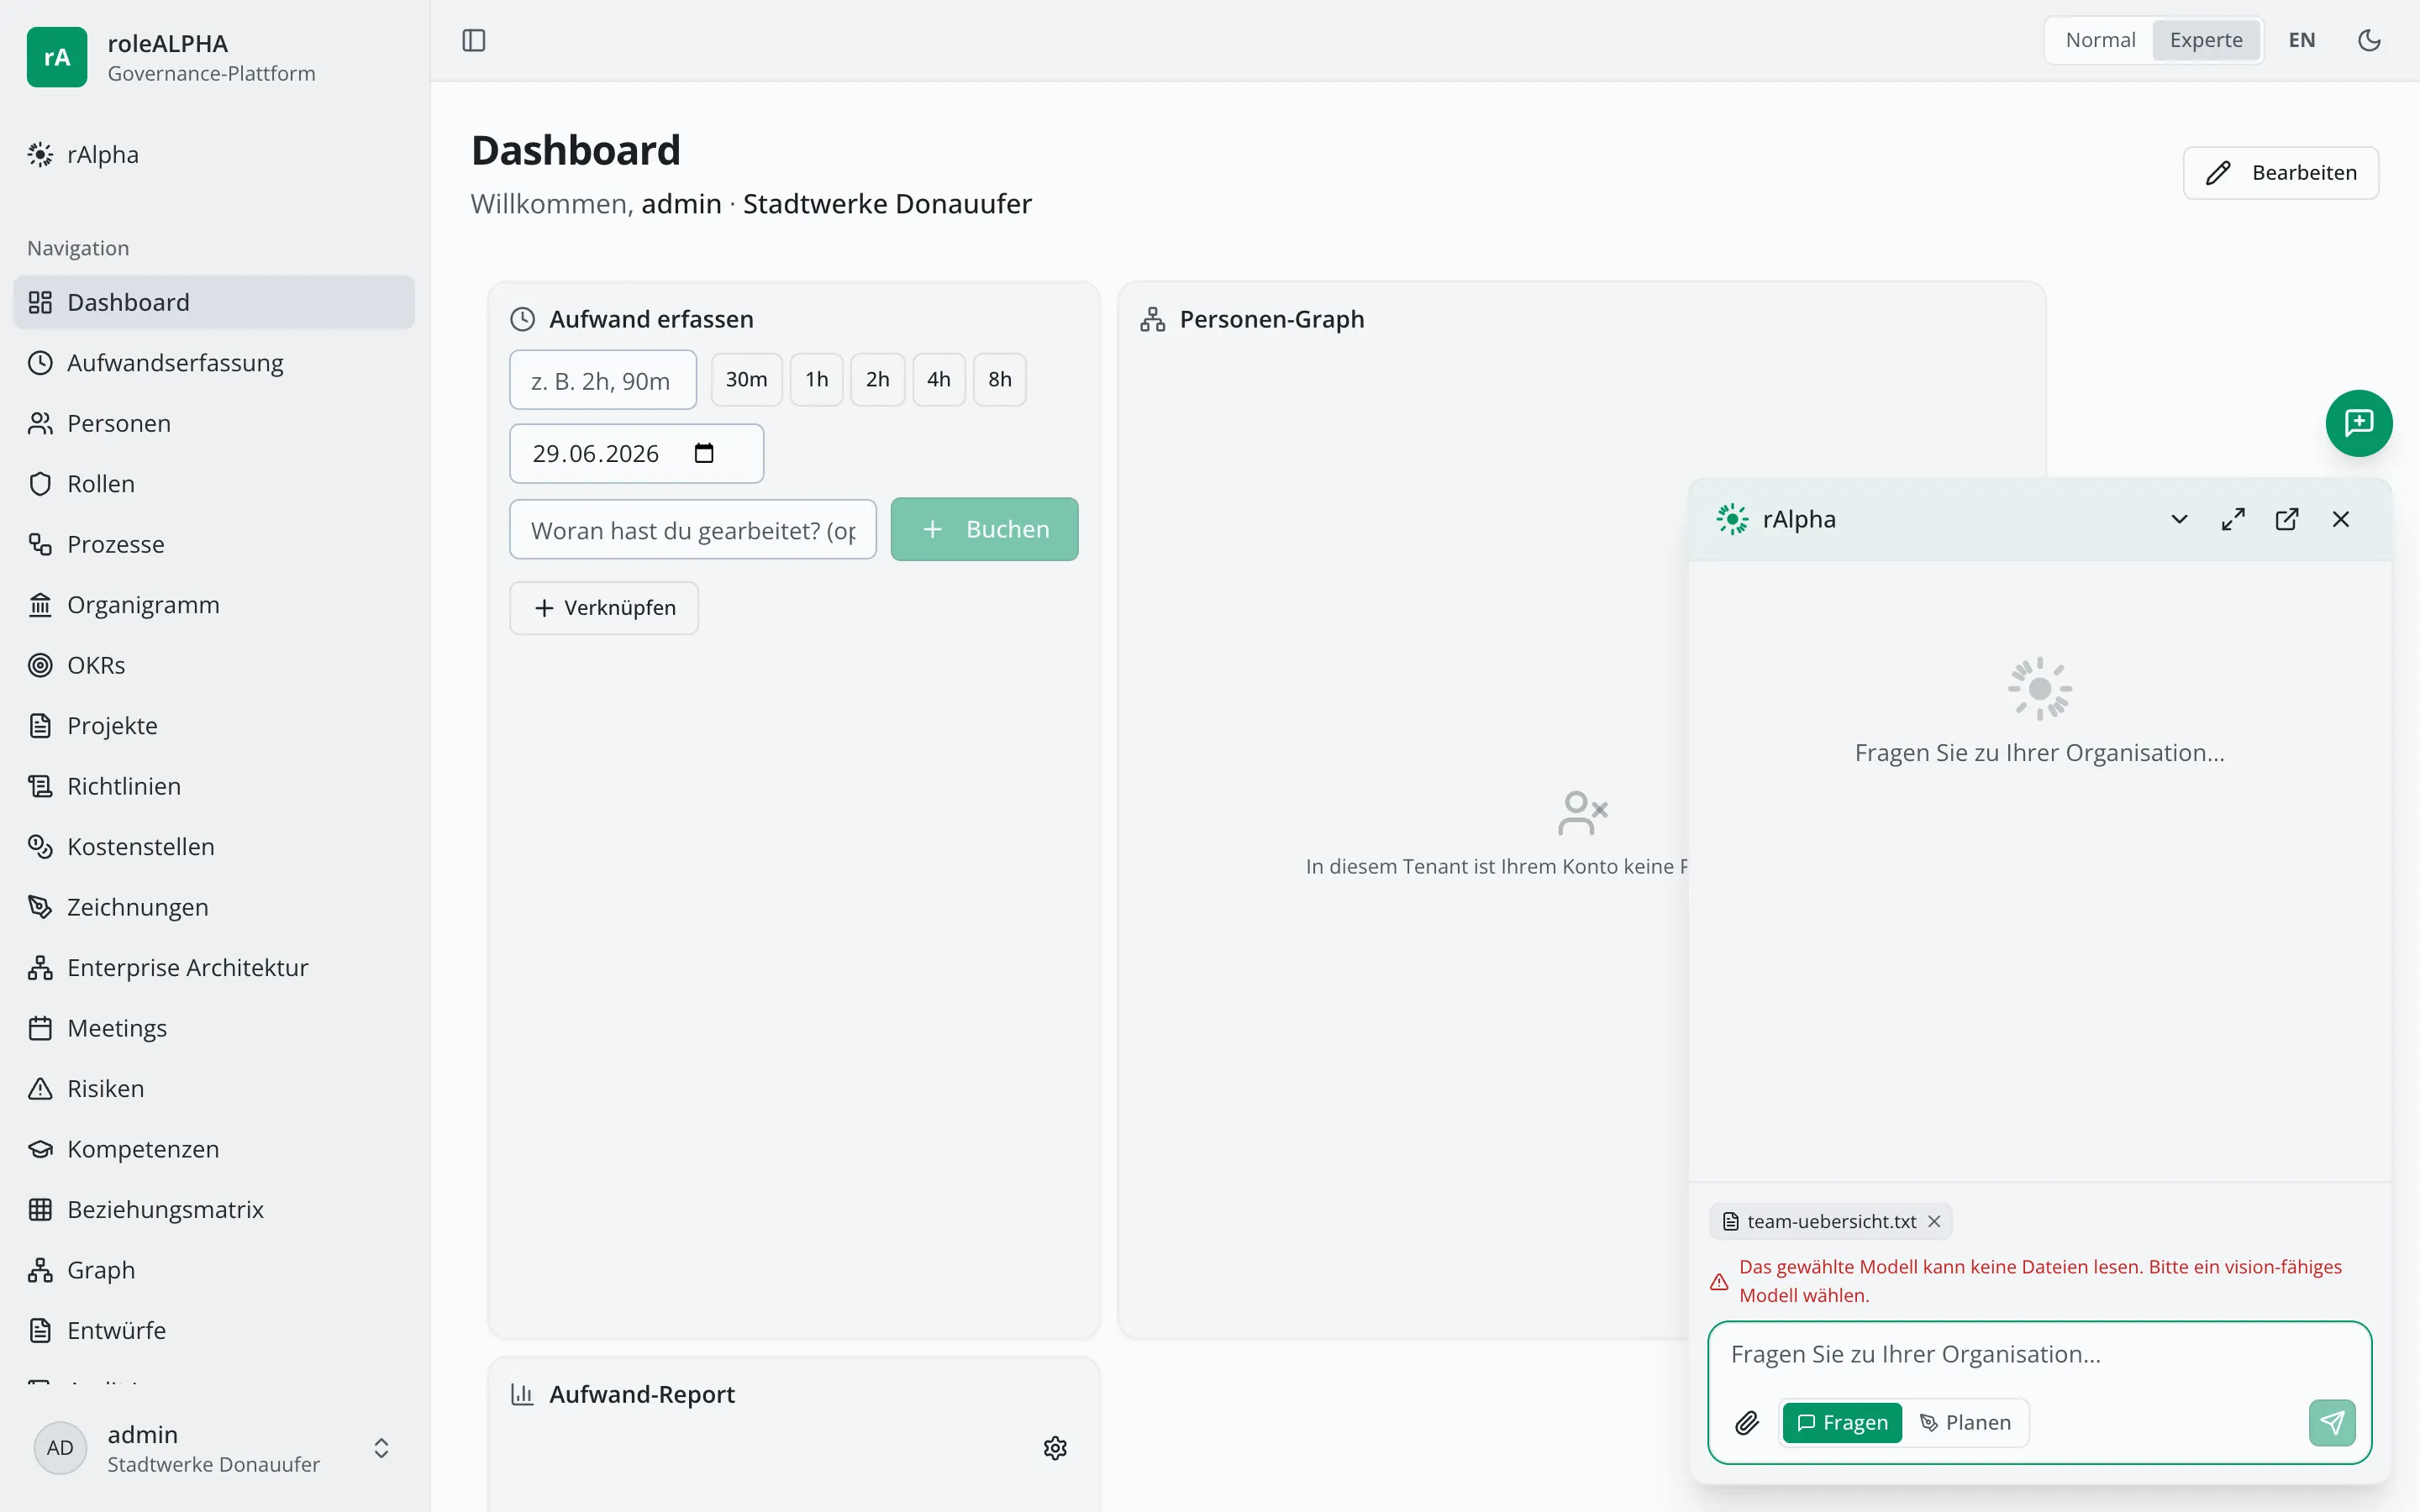
You can attach several files at once (max. 10 files, 5 MB each, 20 MB total). Attached files appear as chips above the input field and can be removed individually.
Pick a vision-capable model
Section titled “Pick a vision-capable model”To read images and PDFs, a multimodal (vision-capable) model must be selected. If the current model cannot do this, sending is blocked and a hint is shown — pick a vision-capable model from the model selector below the input field.
Confirming suggestions
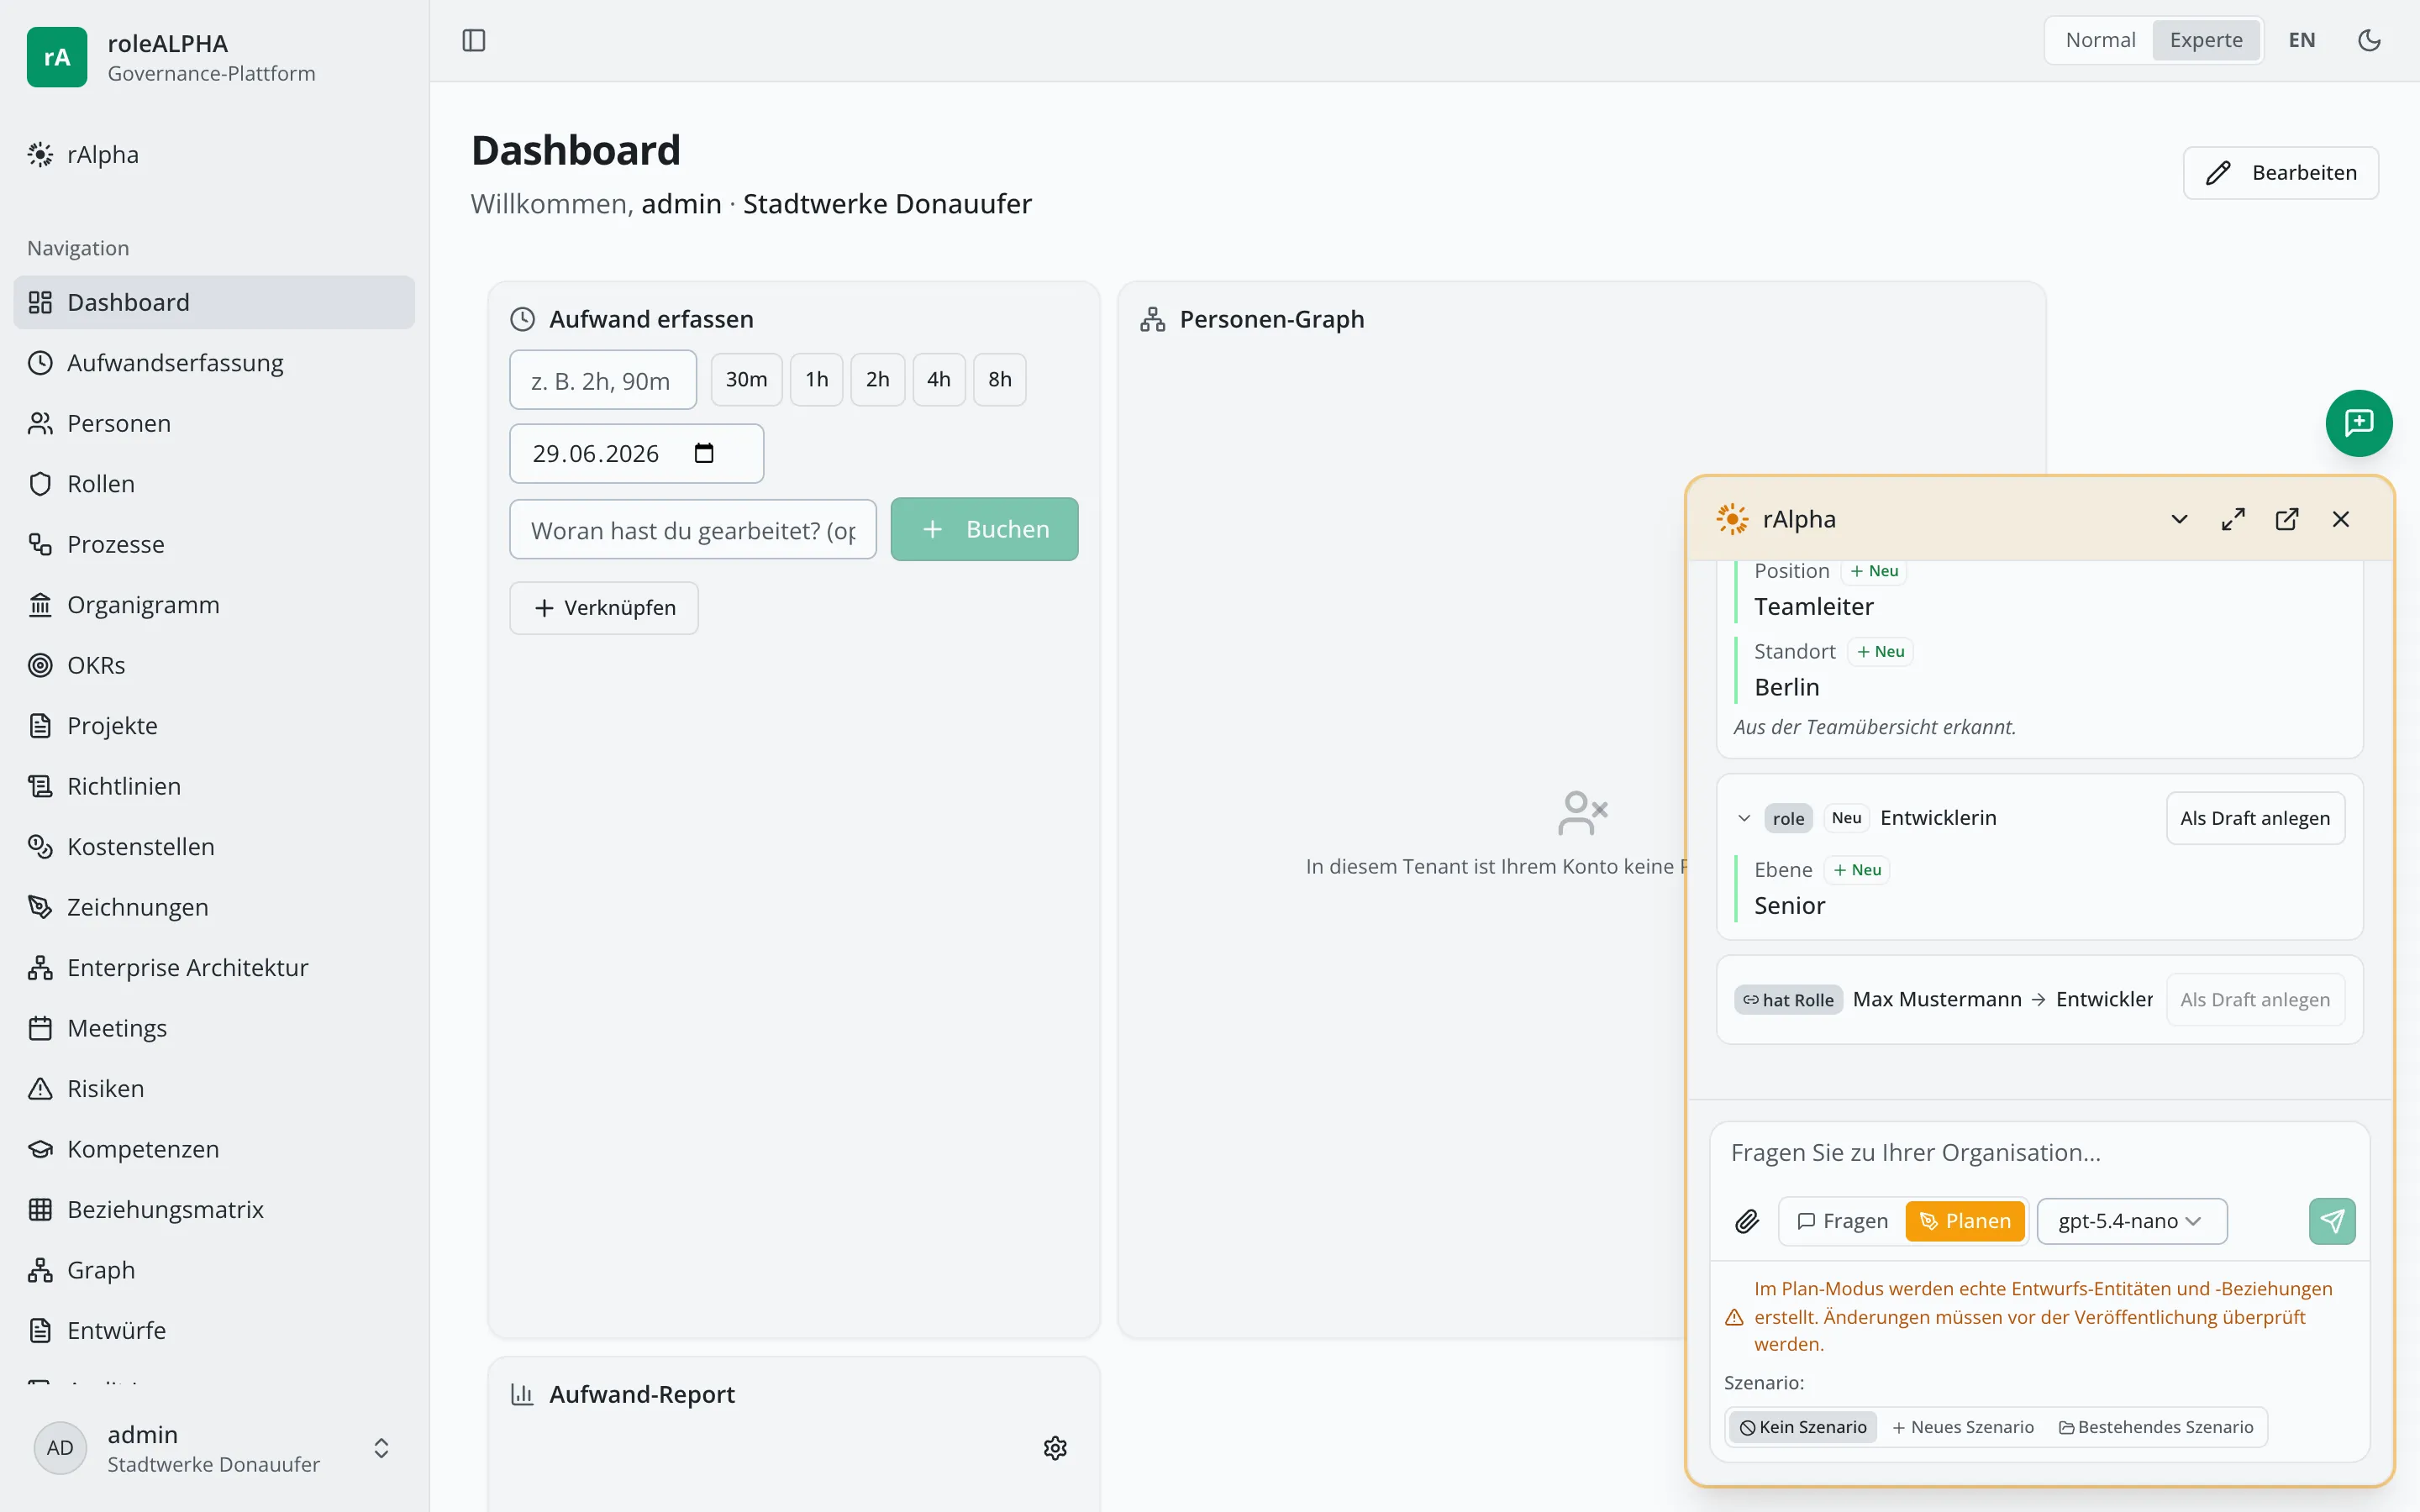
Section titled “Confirming suggestions”Ask rAlph something like: “Create person entities from this file and assign them to their roles.” rAlph analyzes the content and shows the suggestions as cards in the chat. There are three kinds:
- New entity (badge “New”) — entity type, name, detected fields, source.
- Update (badge “Update”) — rAlph found an existing entity and proposes changed fields.
- Relationship — a link
source →[relationship type]→ target, e.g.Erika Beispiel →[has role]→ Developer. Relationships can connect existing and newly proposed entities.
Confirming:
- Create draft turns a single suggestion into a draft.
- Create all drafts accepts all open suggestions at once — creating the entities first, then the relationships, so relationships to new entities are wired correctly.
A relationship card that references a new entity can only be confirmed individually once that entity has been created — easiest via “Create all drafts”. Tip: in Plan mode you can assign the drafts to a scenario so they are approved together and in the right order.
If the create button on a relationship card is greyed out, the reason is stated right below it:
- “Create these entity proposals first: …” — the named entities were found but have not been created as drafts yet. “Create all drafts” does both, in the right order.
- “Endpoint not resolvable: …” — there is no unambiguous suggestion card for that endpoint. This happens when rAlph mentions an entity in its answer without proposing it as a card, or when two cards carry the same name. Ask rAlph to also propose the missing entity, or to repeat the relationship using unambiguous names.
- “Templates cannot hold relationships: …” — the named endpoint is a template. This reason does not resolve itself: a template deliberately does not belong to the organisation structure. To make it appear in a context, that is a replicate (see Templates (unassociated entities)).
If you explicitly ask for a template (“unassociated entity”), the suggestion card carries the Template marking before you confirm it — what that means and which rights it requires is described under Templates (unassociated entities).
Important: suggestions are non-binding. A draft is only created when you confirm, after which it follows the normal approval flow (see Drafts). Nothing is saved without your confirmation.
Discard created drafts right in the chat: If rAlph created a draft as context that you don’t want to keep, you can reject it directly on the draft card via Discard — even if you aren’t allowed to approve it yourself. That way the chat history stays intact as context without leaving an unwanted draft in the drafts area.
Preview in Plan mode
Section titled “Preview in Plan mode”So you understand changes before you accept them, rAlph shows the suggestions right in the chat as a preview — no need to leave the page.
- Plan overview: above the suggestion cards a small panel summarizes the whole plan — e.g. “2 new · 1 changed · 1 link” — so you grasp the scope at a glance.
- Per-card detail preview: click an entity card to expand or collapse its preview.
- For updates you see a before → after comparison: the old value is struck through, the new one highlighted. Only changed and new fields are shown first; “Show all fields” reveals the unchanged ones too.
- For new entities every proposed field is marked “New”.
- Auto-expanded: with up to three suggestions the previews open automatically so small plans are instantly clear. With more suggestions they stay collapsed to keep the list tidy — expand the card you care about individually.
The preview uses the same presentation as the detail page (readable field labels, formatted values) — no raw technical data.
When the assistant asks back
Section titled “When the assistant asks back”In Plan mode the assistant may ask a clarifying question before generating suggestions — for example when key details are missing or a decision is ambiguous. The question appears with option buttons; you can click an option or type a free-text answer in the “your own answer” field. After you answer, the assistant continues right away. In Ask mode it does not ask such questions.
Schema-faithful drafts: every entity type has a fixed set of fields (the field schema). rAlph fills suggestions using only those fields – it does not invent fields outside the schema and respects predefined allowed values. If a required field is missing and cannot be derived from your file or the conversation, rAlph asks for it specifically (see above) before creating the draft. This keeps the generated drafts consistent with your tenant’s data model.
Switching from asking to planning
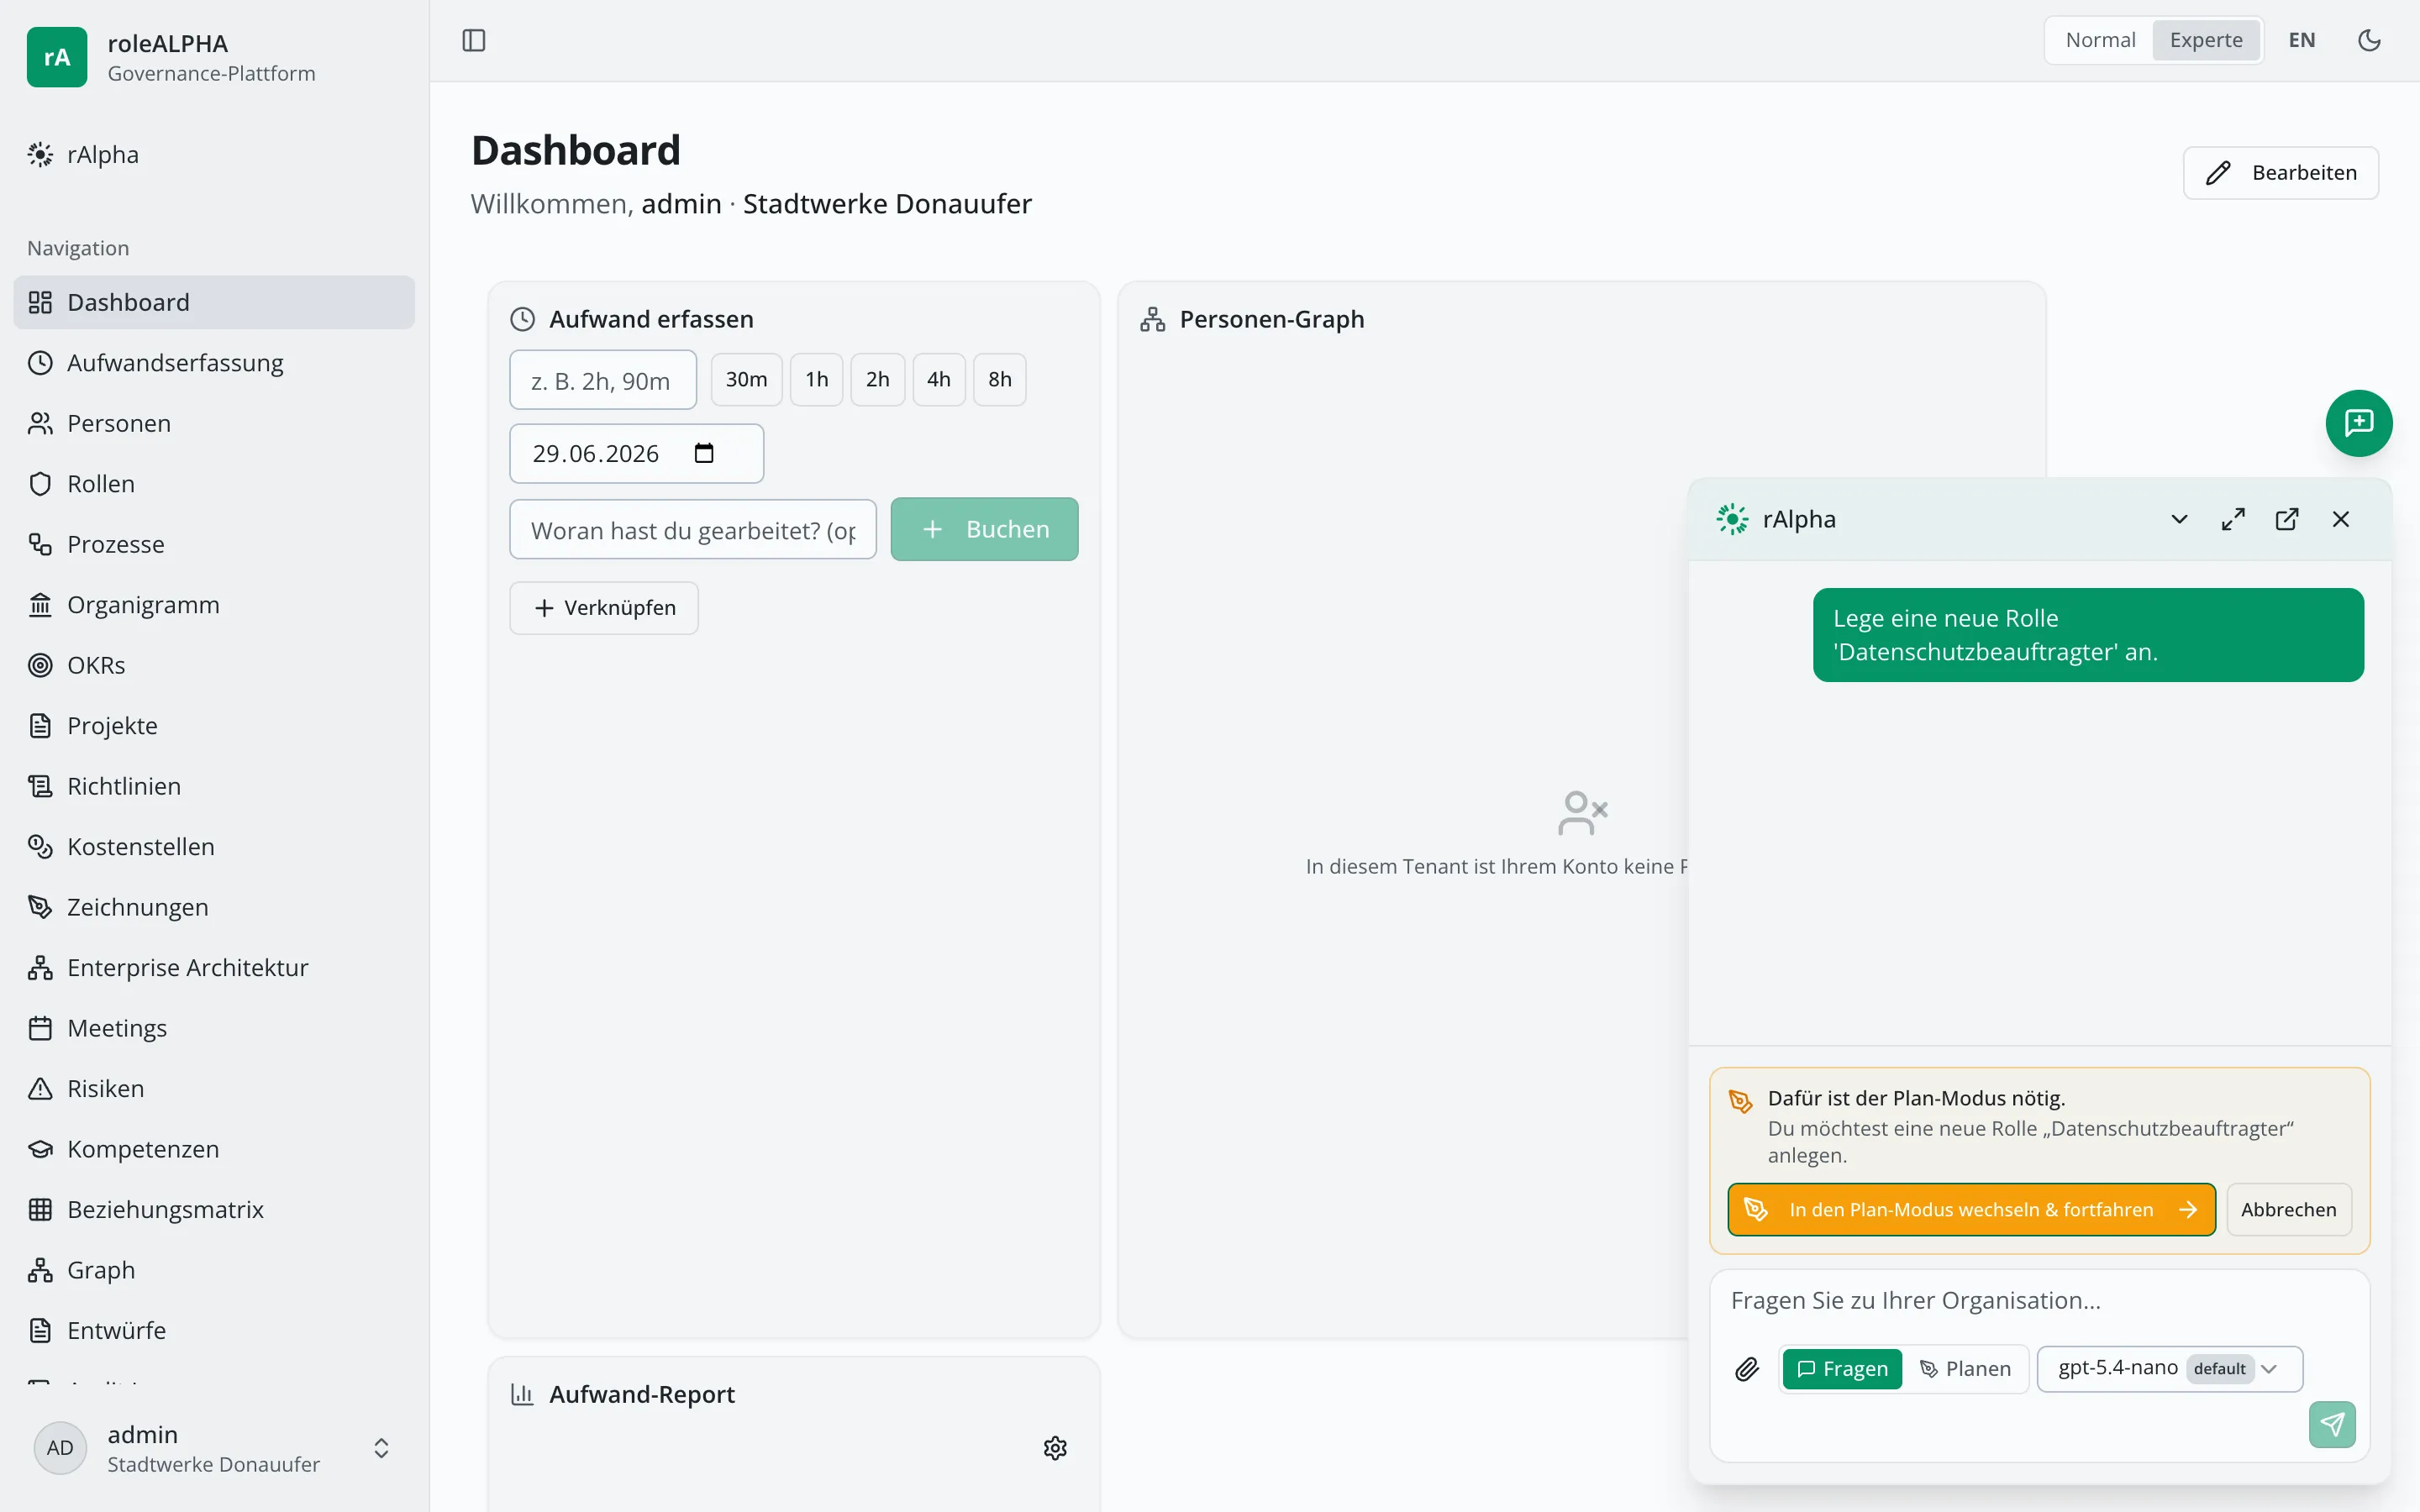
Section titled “Switching from asking to planning”Ask mode is deliberately read-only — rAlph cannot create or change anything there. If you still ask it to create something (e.g. “Create a new role ‘Data Protection Officer’”), it is not a dead end: rAlph shows a small card explaining that this requires Plan mode, with a button “Switch to Plan mode & continue”.
Clicking it
- switches to Plan mode (and therefore possibly to the model configured for it),
- carries over the entire previous conversation as context — you don’t have to repeat anything,
- and re-runs your last request immediately, so rAlph now produces the appropriate drafts or suggestions.
If you’d rather not switch after all, “Cancel” dismisses the card without changing anything. You can also switch any time yourself via the Ask/Plan toggle below the input field.